Creamy Chicken Curry

Photography: Serge Oryan

Hello world! On my side of the continent, temperatures have been very low and our constant search has been lately exclusive for comfort food and soups. My curry recipe is very versatile. The version I’m sharing today is the one that my entire family approves, but I remember cooking this recipe sometimes for lent, using vegetable stock and coconut cream and omitting chicken, (which obviously makes it also vegan). I sometimes add, after blending, boiled cauliflower, pineapple pieces or unsalted cashew nuts. I also like sometimes to have it as a soup by adding one extra cup of stock before blending to have a thinner texture. It not only tastes delicious but it is also very aromatic and can be served on special occasions.

Ingredients

  • 1 tablespoon cooking oil
  • 2-3 chicken breasts, cut into pieces
  • Salt and pepper to taste
  • 1 tsp oregano
  • 1 tablespoon olive oil
  • 200g pumpkin, diced (optional)
  • 1 medium onion, diced
  • 1 teaspoon freshly grated ginger
  • 2 teaspoons curry powder
  • 1 teaspoon ground cumin
  • ½ teaspoon ground turmeric
  • 2 cups fresh tomatoes, peeled and diced
  • 1 cup chicken stock
  • 1 banana, ripen and sliced
  • 1 apple, peeled, cored and diced
  • 2 cups cooking cream or coconut cream

Preparation

  1. In a large pot, drizzle oil and place chicken pieces to cook. Season with salt, pepper and oregano. Continue to fry until fully cooked. Remove chicken pieces and set aside.
  2. In same pot, coat again with oil and add pumpkin and onion. Sauté until soft.
  3. Stir in ginger, curry powder, cumin and turmeric and continue to sauté for about 1 minute then add tomatoes.
  4. Stir in the stock and continue to cook for about 5 minutes or until it starts to simmer.
  5. Add banana and apple pieces and cook for another 10 minutes.
  6.  Off heat, blend the mixture with hand stick blender or by transferring it to a food processor. Blend until smooth. Return mixture to the pot with the cooked chicken and add the cream to heat just few minutes, without bringing it to a boil.
  7. Garnish with sesame, seeds or shredded coconut, and serve with Basmati rice.
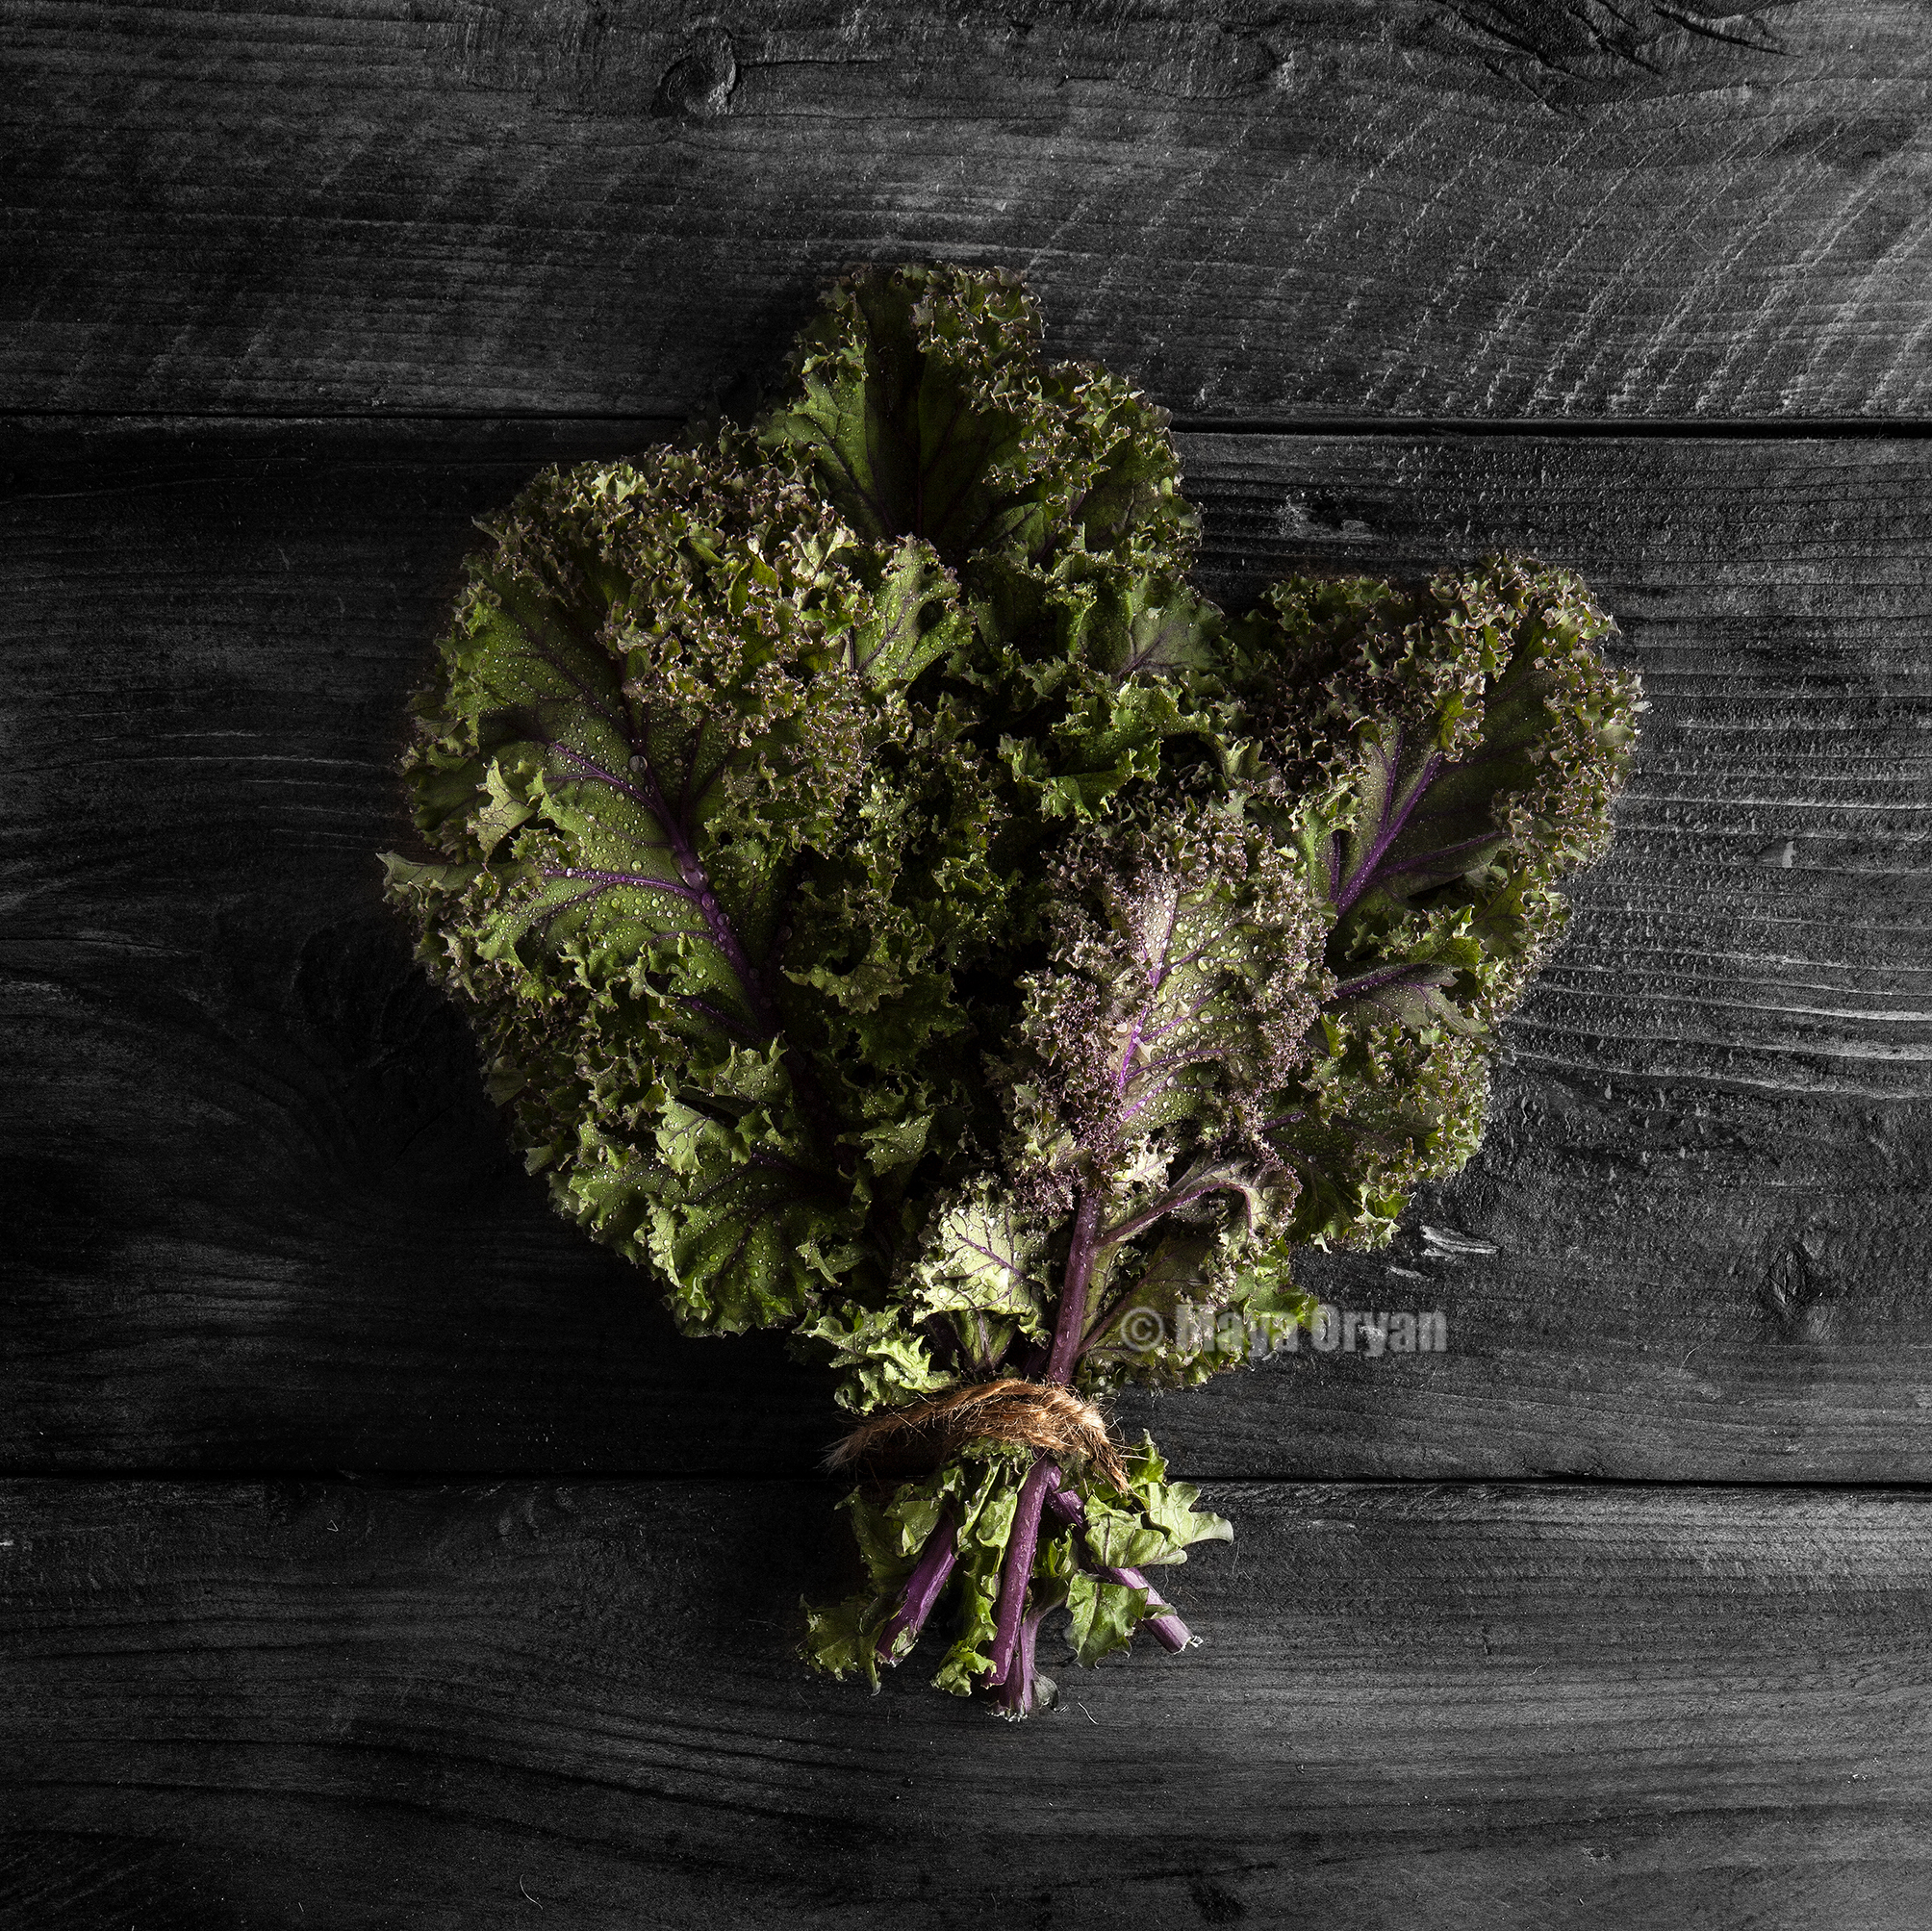
Three different kind of Kale: Curly, Tuscan, and Russian Red Kale!

10 years before I had never heard of Kale, and when I first tasted it I don’t really remember falling for it. Next I hear, it’s becoming an official trend, consumed ravenously and featured on every glamorous salad carte du jour or stylish smoothie menu.

Kale belongs to the group of wild cabbage, their leaves are edible and range in color from light green to dark green with a trace of blue or purple. It grows in a loose bouquet of leaves without forming a head in the center.

Kale are known to like dry, olive oil, or lemon juice hand massages; this quick process helps breaking up the cellulose structure, in a way to get a slightly sweeter and milder taste.

Like quinoa, because of its health value, it became wildly popular. Consuming Kale may help boost your digestive system. It contains a wide range of nutrients like calcium, vitamins A, K and C, fiber, antioxidants, and iron. It is available in different types.

Curly Kale-Blog

  1. Curly-leaf Kale

This is the most common type. They tend to have a distinct peppery flavor. The leaves are so crinkly and tight. The best way to chop them is to separate the leaves from the stalk first, next lay the leaf upside down on the chopping board and using a knife cut following the stalk down along both sides. The stalks are fibrous and hard, if you prefer not to discard them, they can be used to make stews or stocks.

Russian Kale-Blog

  1. Russian Red Kale

Russian red kale has dark green fringed leaves and red stems. They somehow resemble to oak leaves. The tips of the leaves are tender and sweet with a slight edge of nuttiness making it a good ingredient for raw dishes. They are juicy but not tender, the stems are thick and fibrous to consume same like Tuscan and curly kale. This gourmet variety will add lavish touch to your menu.

Italian Kale-Blog

  1. Baby Tuscan Kale

Tuscan Kale is better known by Italian as “cavolo nero” translated to English as black cabbage and often used in the Tuscan soup “ribollita”. Other names include dinosaur kale because its leaves resemble to dinosaur skin! It’s different than the curly kale because of its dark green color, smooth tender texture and mild flavor. It’s actually this type of Kale that changed me from a kale-hater candidate to a living-by-it one! It doesn’t taste bitter and has a deep nutty sweetness that I relish in my salads. Above picture features baby leaves, but it comes in bigger leaves as well.

Lebanese Sahlab – “SALEP”

Sahlab by Maya Oryan1

Many 5 stars hotels in Turkey greet you with a cup of Sahlab or Salep at arrival. This drink was introduced to Lebanese by Ottomans. Originally it consists of milk and orchid flour, but now many cafés prepare it with milk, sugar and cornstarch. I personally use Sahlab mix, they are available in many brands in Lebanon and all over the world. You just mix it with hot milk and ready in a-snap-of-a-finger! Some add orange blossom water or honey, others top it with pistachios and shredded coconut, but I like it the way dad used to make it, sprinkled with cinnamon and served with kaak on the side.

This thick, creamy drink experiences higher demand on cold winter days—perfect for snuggling on the sofa. In hot summers, it can be found among ice cream flavors.

Sahlab is popular throughout the Middle East, and heard from my vegan friends that it can be done with soya milk.

If you can get Sahlab -Salep- fine powder, here below the recipe!

Ingredients

  • 2 cups milk
  • 1 1/2 tsp ground sahlab
  • pinch (or a bit more) of ground mastic
  • 2 tbsp sugar

Preparation

  1. Dissolve the mastic in 1/3 cup warm milk. Set aside.
  2. On a medium heat, pour the rest of the milk and bring to boil. Add the Sahlab by sprinkling gradually and stirring. Keep stirring for about 5 minutes.
  3. Add sugar and stir. Transfer the mastic milk mixture and stir to form a thick creamy milk.
  4. Serve hot sprinkled with cinnamon and with your favorite brioche or kaak.

#confinement_day45

Instagram @MayasIngredients

Honey Almond Slices

Honey Akmond Slices - Blog

FRIENDS… and not the TV show! Friends that we have, from school, work, clubs… and friends we make through our children later in life. How many times while dropping your child at a new friend and when waiting for the door to open, you start wondering about the mom… Is she nice? Fun? Warm? Chatty? Psycho? Does she give a lot of sweets? And how many of them ended to be a keeper and became one of your closest friends. I am blessed with few of them, actually many, and we share a lot; we take trips together, we volunteer for school projects and we sometimes bake together.

The Honey Almond Slices is a new recipe for me. Axel, my daughter, had tasted it at her friend’s house and at pick up time she begged me to bake some for her. The funny part is that the mom bought her bars at the market and doesn’t even know what it was called. Thanks God for Pinterest where I combined few recipes and made my own with less butter and less sugar but still I thank my friend for the inspiration. My eagerness is boundless to try new recipes, especially that belongs to the dessert section.

Ingredients

For the base:

  • 1 ½  cup all purpose flour
  • 1 cup ground almond
  • 1/2 cup light brown sugar
  • 120g butter, melted

For the topping:

  • 150g butter
  • ¼ cup brown sugar
  • ¼ cup honey
  • 2 cups sliced almonds

25 cm x 25 cm pan

Preparation

  1. To make the base Combine flour, ground almond, brown sugar and melted butter until you have a moist sandy mixture. Press mixture into a brownie mold or tart tin and bake for 12 minutes at 170°C / 335°F.
  2. To make the filling Inside a saucepan, on low-medium heat, place butter to melt, add sugar, honey and sliced almonds. Stir to well combine.
  3. Spread mixture to top evenly the base and return to oven to bake for 25 minutes or until deep golden brown.
  4. Allow to cool completely. Remove from pan and slice into squares or rectangles and serve.

Cream Cheese Strawberry Cake

Valentine Strawberry cake2.jpg

I got this heart shaped pan on Mother’s Day few years ago, I’m so happy for Valentine day to find an excuse and use it again. This cake is spongy and smells gorgeous. The texture is close to breads so don’t hesitate to bake it in a loaf pan if desired.

Gifts, flowers and cakes are all expressions of love and celebration, most important of get-together. I wish you all love and happiness and a lot of cakes to bake.

Maya

Cream Cheese Strawberry Cake

Ingredients

  • 200g butter, softened
  • 1½ cups sugar
  • 8 oz cream cheese
  • 2 large eggs
  • 1 teaspoon vanilla extract
  • 2½ cups plain flour
  • 2 teaspoons baking powder
  • 1 teaspoon baking soda
  • ½ teaspoon salt
  • 1 cup yogurt
  • 1½ cups chopped fresh strawberries

Preparation

  1. Preheat oven to 180°C / 350°F. Grease and flour your cake pan and set aside.
  2. Cream the butter, cream cheese and sugar together with an electric mixer.
  3. Add the eggs, one at a time, followed by vanilla and beat.
  4. In a large bowl, whisk together the flour, baking powder, baking soda and salt. Gradually stir the flour mixture into the cream cheese mixture, beating just until combined.
  5. Add yogurt, mixing well to incorporate. Fold in the strawberries.
  6. Transfer batter to the prepared pan, spreading evenly with a spatula. Bake for 1 hour, or until a cake tester inserted into the center of the cake comes out clean.
  7. Remove pans to rack, and let cool for 10 minutes. Invert cake onto serving plate and allow to cool completely before slicing.

Chestnut Banana Bread

Chestnut Banana Cake.jpg

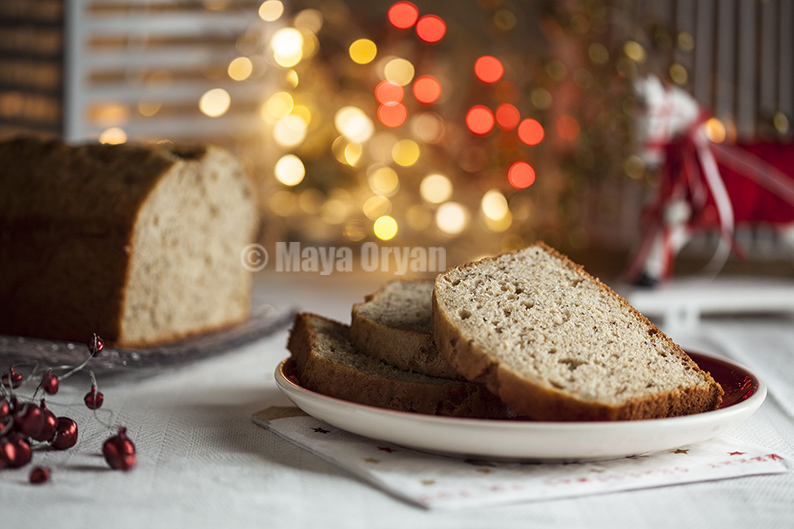
Christmas just wouldn’t be Christmas to me without a lot of recipes with chestnut on the table.

I have a home-made chestnut cream that I did last week, so I decided to bake my regular banana cake recipe and add it to it, the results were simple and delicious.

I know this recipe is a keeper and definitely worth to share with you.

Chestnut Banana Bread

Ingredients

  • 2 cups all-purpose-flour, sifted
  • 1 tsp baking soda
  • 1 teaspoon baking powder
  • ¼ teaspoon salt
  • ½ cup unsalted butter, diced
  • ¾ cup brown sugar
  • 3 eggs, at room temperature
  • 1 tsp vanilla extract
  • 3 small mashed ripe bananas
  • 3 tablespoons chestnut cream
  • ¼ cup milk

Directions

  1. Preheat oven to 180°C / 350°F. Grease a 9×5-inch loaf pan.
  1. In a large bowl combine flour, baking soda, and salt. Set aside.
  2. Beat butter and sugar until creamy. Add eggs and vanilla, continue beating about 3 minutes.
  3. Add bananas followed by chestnut cream and beat until combined.
  4. Gradually add dry ingredients; flour, baking soda, baking powder and salt.
  5. Beat in milk.
  6. Pour batter into pan and bake for 50 minutes or until a toothpick inserted into the center of the bread comes out clean.
  7. Allow bread to cool for 10 minutes, then turn it out and let it cool completely on a wire rack.

Mistletoe Mimosas

Cranberry Grenade Mimosa.jpgMimosas are astonishingly, ridiculously, exceedingly, embarrassingly easy to make. Not that simple doesn’t taste yummy and easy won’t add the sparkle you’re looking for:) The flavors are splendid! I promise you a cool drink that will deliberately take care of the mood.

Merry Mimosas everyone!

Ingredients

Serves 6

  • 6 tablespoons grenadine syrup
  • 1 cup cranberry juice, chilled
  • 1 (750ml) bottle champagne, chilled
  • Rosemary sprigs, to garnish
  • Fresh cranberries (optional)

Directions

  1. Add 1 tablespoon of grenadine syrup in each flute.
  2. Combine cranberry juice and champagne together and fill up the flutes almost right to the top. Garnish with rosemary and drop the berries right before serving.