Another Lebanese Dessert, the Snayniyeh!

Lebanese are very special when it comes to languages. I, like many Lebanese, speak to my daughter in French, send her to a school where she learns English and Arabic and lives in a country where the spoken language is Lebanese.

Gulf countries have a translation for every foreign word while we Lebanese have our own mishmash of languages, we don’t mind speaking 3 languages in one sentence; if it’s a computer then let’s call it a computer and not “hassoub”, and if French call it Filet, don’t think hard, everybody knows what Filet de boeuf is. I love this! It’s not complicated!

So when Kaia, asks me: “Mom what is cheese in Arabic?”, I proudly answer: “Jibneh”, but if she asks: “What is Cheese Cake?”. I answer: “It’s Cheese Cake!” Who knows what Gateau jibin is!

This morning she asked: “What is Snayniyeh in French?” I said: “It’s Snayniyeh!”. “And in English?” I answered: “Also Snayniyeh!”. She smiled and said: “It’s funny!

Fair enough, no? Italians have Tiramisu and Panna cotta we Lebanese have Snayniyeh and Meghleh. Why try calling it anything else!

Every name hides a little story behind. Snayniyeh is derived from “snan”, which means teeth in Lebanese and this scrumptious dessert is usually prepared to celebrate the appearance of a child’s first tooth. A sure phenomenal event for every mom!

I love our traditions! Meghleh to celebrate the birth of a child, Snayniyeh for teething, Maamoul for Easter and Awwamat for Ghtas (Christ’s baptismal night), isn’t it sweet☺

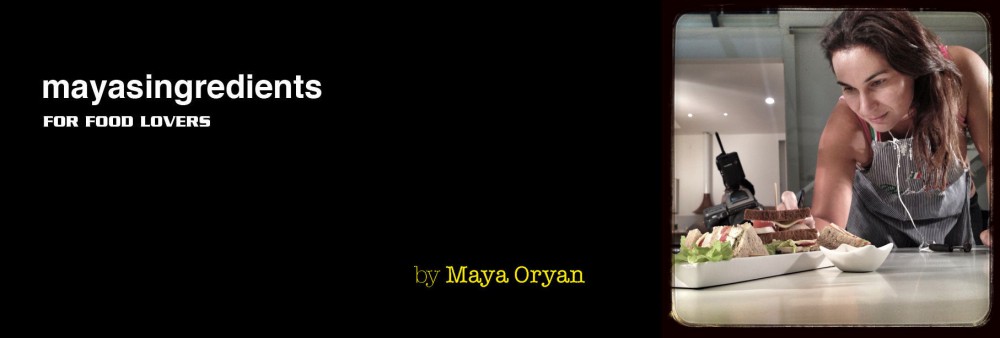
The name Snayniyeh put a smile on many faces as it brings back sweet memories! It’s simple and healthy and this is how I make it.

Ingredients

  • 1cup hulled wheat, washed and rinsed (in Arabic ameh ma’chour)
  • 1lt water
  • 1 large pomegranate, peeled and seeded
  • 3/4cup icing sugar
  • 1/2cup orange-blossom water
  • 1/2cup pistachios, soaked in water for about 1 hour
  • 1/2cup almonds, soaked in water for about 1 hour
  • 1/2cup walnuts, soaked in water for about 1 hour
  • 1/2cup sugared chick peas

Preparation

  1. Cook the wheat in boiling water for an hour or until tender and all the liquid has been absorbed.
  2. Remove from heat and stir in icing sugar and orange-blossom water.
  3. Mix with the pomegranate seeds.
  4. Scatter the rest of the ingredients on the top and serve hot or cold.

Quails With Prunes And Thyme

My friend Ellà is a foodie too, whenever I invite her over, I feel my cooking skills are being tested. I have to admit her food is DELISH! I found out the best way to avoid her comparisons with other recipes was to cook her meals she never had before or at least not common meals, like quails (in Arabic is Ferreh).

I think we all have Ellàs in our lives and wondering how to impress them. This recipe is simple and does the job, but don’t forget to top it with liquor. Only liquors with high alcohol content can be used to flame food. I use cognac, rum or brandy. Wine or beers will not work. Flambé food adds an extravagant touch to the evening, especially if it’s done at the table where it’s served. I usually transfer quails to a serving dish and ignite the brandy. It’s dramatic! And my guests ARE impressed! What kind of show off is this? Trust me the feeling is fabulous! How do I know, you ask? ‘Coz Ellà called the next day I invited her and asked for the recipe:)

Quails flambéed with Prunes and Brandy

Ingredients

  • 6 Quails
  • 3 tbsp butter, melted
  • 3 tbsp sumac
  • 1 tsp salt
  • 1 tbsp sugar
  • 1 tbsp cinnamon
  • 6 prunes, pitted
  • 2 onions sliced
  • 4 carrots, sliced
  • 1 bunch fresh thyme
  • 3 stalks celery, chopped
  • 500ml Vegetable Stock
  • 1/4 cup brandy

Preparation

  1. Position a rack in the lower third of an oven and preheat to 220°C/400°F.
  2. Rinse inside and outside of quails, and pat dry with paper towels.
  3. Add sumac and salt to the melted butter and use this mixture to brush all 6 birds.
  4. Mix sugar and cinnamon and season each of the bird cavities.
  5. Fill each of the cavities with one prune, 1 tablespoon of onion, and little of the bunch thyme. Tie the quail’s legs together with kitchen twine, and set aside.
  6. In the bottom of a large roasting pan, scatter the vegetables; carrots, celery, the remaining onions and thyme. Arrange the quails on the top of the vegetables. Drizzle with stock and bake for 55 minutes or until quails are cooked through.
  7. To make the flambé, pour the brandy over the quails and ignite with a match or a lighter. When flame goes out and liquor has burned off, you are ready to serve.
  8. It’s great with rice, green salad and pitta bread.

Mama’s Sfouf

I’m back to my kitchen, to my bed and most importantly to my family. Gosh! I missed my hubby and daughters. Four weeks away from home felt very long and slow. I felt the time freezing, as if the Earth was not rotating, but Thanks God, there’s a bright side for every story, because I was working with a wonderful team, on a very big brand, learning splendid recipes from a gifted chef.

I came back a week ago! I miss cooking so much that we had different menu everyday for breakfast, lunch, dinner and even dessert. My family and I are overwhelmed.

The first item I want to share with you after my return is Sfouf cake.

Sfouf are fun! It’s a Lebanese dessert known for its distinctive yellow color coming from the addition of turmeric. Sfouf can be enjoyed with milk, tea or coffee. It contains no eggs or no butter, mix the ingredients the way you like and make sure you will get a superb cake flavored with aniseed and turmeric spices; two of the healthiest spices available. Like many recipes, the quantities varies from a kitchen to another, but my mom’s recipe is simply the best☺

Sfouf (Sfoof)

Ingredients:

  • 3 cups Semolina Flour
  • 3 cup Flour
  • 1cup Vegetable oil
  • 1 tbsp Turmeric (a.k.a Curcuma)
  • 2 tsp Baking powder
  • 2 tsp Aniseed (ground)
  • 1 tsp Vanilla
  • 2 cups Sugar
  • 21/2 cups Milk (or water)
  • 2 tbsp Tahina (sesame paste)
  • Sesame seeds, Slivered almonds or Pine nuts, to garnish

Directions:

1. Preheat oven to 180C

2. In a bowl, mix semolina, flour, turmeric, baking powder, aniseed and vanilla. Add oil and stir to make a paste.

3. In a separate bowl, melt sugar in cold milk. Add gradually to the flour and spices paste and mix using an electric cake mixer.

4. Grease the baking dish with Tahina and pour batter. Make sure it’s flat and even. Sprinkle with sesame, pine nuts or decorate with almonds.

5. Bake for approximately 30 minutes, or until golden-brown. Allow to cool for 15 minutes. Cut in pieces like you do for brownies and serve.

Please note, this same recipe can be done without milk. Just dilute sugar and aniseed in water and add it to the flour and spices mixture.


Chicken Breasts with Parmesan and Mashed Vegetables

My day starts at the gym, and while my body is burning calories, funny enough, my mind is thinking: “What should I cook today?”

The competition is tough. I’m going to be in Dubai for a 4-weeks-shoot and my mom is coming to look after my daughters and cook few of her delicious food. God Bless my mom, she’s the best!

I really want Kaia and Axel to remember me cooking something they love before I travel and leave a tasty impression. My choice is Chicken Breasts with mashed potatoes, mashed carrots and mushy peas. It’s a fancy dish, healthy and colorful.

I love those recipes filed under Food Family, they make everybody in my house happy!

There’s something about the mashed vegetables that I love! (Trust me I still have all my teeth;-) It has to be the colors, not only the taste.

I melt in front of a plate with mashed potatoes, carrots and something green like peas or broccoli, it feels a lot like baby food but a pump of each color adds a lot to the presentation of the plate. Here you go, this is the food stylist in me speaking;-)

This dish is a crowd-pleaser and can be prepared for your family or for your guests. I hope you enjoy all four recipes!

Unfortunately I’ll have to drop off the radar on you for the following weeks, as I’ll be living in hotels and away from my beloved kitchen.

Chicken Breasts with Mashed Vegetables

Ingredients

  • 4 pieces / 500gms chicken breasts
  • ¼ cup sunflower oil, for frying
  • Pistachio and pumpkin seeds, to decorate

Marinade

  • 1 cup / 250ml milk
  • 1 fresh lemon, cut in 4 wedges
  • 1 fresh apple, cut in 4 wedges
  • 1 tsp salt

Coating

  • ½ cup / 120 g plain flour
  • 2 eggs, beaten
  • ½ cup / 120 g dry breadcrumbs
  • 3 tbsp Parmesan, freshly grated
  • Salt and white pepper, to season

Preparation

1.In a bowl or plastic container mix the marinade ingredients and soak the chicken for 2 to 3 hours.

2.Prepare 3 plates. Put the flour in the first plate, the eggs in the second and the mix of the breadcrumbs, Parmesan, salt and pepper in the third plate.

3.Take out the chicken from the marinade and toss them in the flour first. Dip in the egg second and roll in the breadcrumbs mixture to coat.

4.In a large frying pan heat the oil and cook the chicken breasts for 3–4 minutes each side or until golden and cooked through, turning occasionally.

5.Alternatively, it can be baked in the oven. Pre-heat oven to 200ºC. Place the chicken pieces on a greased baking sheet and bake for15 to 20mn.

Mashed Potatoes

 Ingredients

  • 5 medium size potatoes, peeled and cut into big chunks
  • 1/4 cup milk
  • 1 tbsp butter
  • 1/2 teaspoon salt
  • White pepper, to taste

Directions

1.Bring a pot of lightly salted water to a boil over. Add potatoes, and cook until tender.

2.Drain potatoes, and purée with a hand potato masher. Add butter, milk, salt and pepper, and mash until blended. Adjust seasonings to taste and serve.

Mashed Carrots

 Ingredients

  • 500g carrots, peeled and chopped
  • 1 sprig of spring onion, washed and sliced (the white part only)
  • 1/4 cup vegetable stock
  • 1 tbsp butter
  • 1 tsp brown sugar
  • Salt and pepper, to taste

Directions

1.Bring a pot of lightly salted water to a boil over. Add carrots and onions, and cook until soft.

2.Drain carrots and onions. Blend using a food processor. Add butter, sugar, stock, salt and pepper. Blend until smooth. Adjust seasonings to taste and serve.

Mushy Peas

Ingredients

  • 500g frozen or fresh peas
  • 2 tbsp olive oil
  • 1 tsp sugar
  • 1/2 teaspoon dried mint
  • Black pepper and salt, to taste

Directions

1.Bring a pot of lightly salted water to a boil over. Add peas, and cook until tender.

2.Drain peas, and purée with a hand potato masher. Add olive oil, sugar, mint, salt and pepper, and mash until blended. Adjust seasonings to taste and serve.

Sugar Sugar Cookies

Tomorrow, Kaia has her first bake sale at school this year. I always send with her cookies. They are easy to prepare, firm enough to transport and the students love them.

She loves helping, she rolls the dough skillfully and found out on her own that it’s better to dip the cookie cutter in flour before making shapes. My little munchkin has great tips to give away!!

This recipe is great for cookies coated with icing or decorated with sprinkles. Deliciousness in every single bite! I think that tiny pinch of salt added, changes all the taste and makes it a show-stopper for everyone.

If you use chilled butter your dough should come out firm. If it happens that it’s soft, chill the dough for half an hour before start working with it.

You might like to sprinkle crystal sugar or colored sugar before baking the cookies, to add a sparkle. Easiest cookies recipe ever!

And this is how I make it.

Makes around 30 pieces.

Ingredients

  • 200g / (2 sticks) unsalted butter, diced
  • 1 ½ cups sugar
  • 1 egg, lightly beaten
  • 1 ½ tsp vanilla
  • 2 ¾ cups all-purpose-flour, sifted twice
  • 2 tsp baking powder
  • 1 tsp salt

Preparation

  1. Pre-heat oven to 180°C / 350°F, and place rack in the center of the oven. Line baking trays with parchment paper.
  2. Cream butter with sugar until light and fluffy.
  3. Beat in egg and vanilla.
  4. Add flour, baking powder and salt. Mix until a dough is formed.
  5. Divide dough into 2 balls. On a lightly floured surface, roll out each ball to an approximate thickness of 1/4 inch (6 mm). Dip cookie cutter in flour before cutting out shapes and transfer to baking sheets.
  6. Bake cookies 10 to 12 minutes (depending on size) or until edges are firm and cookies are dry to the touch. Do not let cookies color.
  7. Cool on sheets 1 minute; transfer to a wire rack to cool completely.

Note: If you’re using large cookie cutters, place the baking sheets with the unbaked cookies inside the refrigerator for about 10 minutes to chill. This will prevent the dough from spreading and loosing shape while cooking.

Rocca, Halloumi and Pine Nuts Salad


The last couple of weeks passed by insanely fast. Hectic is not enough to say! Between photoshoots, home duties and my daughter’s homework, I haven’t had enough time to enjoy in my darling kitchen.

Salads were the most convenient to prepare, in the little time I found to spend in the kitchen. I prepared many salads this week, all containing 2 to 4 kinds of green leaves, 1 type of nut and 1 source of protein (cheese, cold cut, etc.). I used the words “this is the easiest salad ever” for every recipe I did:)

Thank God Serge loves it when I fix a light dinner! A crisp, fresh salad always draws a smile on his face (and mine). We both workout a lot every morning, we don’t want to waste that eating a lot of carbs in the eve.

Ingredients

  • 1 head of Red Oak Leaf Lettuce, shredded
  • 10 leaves Iceberg lettuce, shredded
  • 1 pack Rockets leaves, clean and picked
  • Handful of Pine Nuts, toasted
  • 200g Halloumi, sliced (8mm to 10mm thick)

Vinaigrette

  • ¼ cup Balsamic Vinegar
  • ½ tsp Salt
  • ½ tsp Dijon Mustard
  • 1 tsp Honey
  • ¾ cup Olive Oil
  • Sprinkle of Dried Mint (optional)

Preparation

Place in a non-stick pan the Halloumi slices and cook on both sides for about 5mn or until it becomes brown and soft.

Mix together rocket leaves, lettuce and iceberg and sprinkle with salt. Add the pine nuts. Garnish with the grilled cheese.

To make the sauce, whisk together vinegar, salt, mustard until salt is dissolved. Add the honey, then the olive oil in a slow stream and keep whisking. Sprinkle with dried herbs if desired. Drizzle over the salad and serve.

Lemon Cake

Serge just came back from Dubai and got me this new Bundt® pan from Nordicware. I know a normal woman would cheer up over jewelry, a designer’s bag or a perfume but definitely not a pan! Hearing me shouting: “YESSS!! For meeee!!”. How many of you would have guessed that my gift could have been a baking pan, really? Come on!

I’m sure some of you would have thought giving a BANG! on the hubby’s head just for the thought of it hihihi… well not me! I’m a proud wife today, and I’m really happy to bake a lemon cake inside my new pan.

I love the preparation of this cake, the smell of the lemon zest is irresistible!

Ingredients

  • 1/2 cup (1 stick/ 100gms) unsalted butter, at room temperature, diced
  • 2 cups sugar
  • 1 tsp vanilla
  • 6 eggs
  • Zest of 4 lemons
  • 100g white chocolate, melted
  • 3 cups all-purpose flour
  • 1/2 tsp baking powder
  • 1/2 tsp baking soda
  • 1/2 tsp salt
  • 3/4 cup full fat milk
  • 1/4 cup limoncello
  • Icing Sugar, to dust

Preparation

1. Preheat the oven to 185 degrees C. Grease and flour a 12-cup pan.

2. In a large bowl, using a hand mixer or a stand mixer, beat butter and sugar together until light and fluffy, about 3 minutes. Beat in eggs, one at a time. Beat in vanilla.

3. Add the lemon peel and the white chocolate. Mix until incorporated.

4. Sift flour, baking powder, baking soda, and salt in a large bowl. Set aside.

5. In a measuring cup combine the milk and the limoncello. Add to butter mixture alternating with flour. Beat until well mixed, making sure to scrape down the bowl with a spatula.

6. Bake for 1 hour or until a toothpick inserted in the center comes out clean. 7. Remove the cake from the oven and let it cool on a wire rack for ten minutes, then remove it from the pan and let it cool completely before dusting with icing sugar.

Zucchini and Mushroom Risotto

My sister Hala, who also loves cooking and dinner parties, was telling me that Risotto is not a popular dish in Lebanon. I don’t know how true is this, but I know that I only love it when served immediately. This is one of the dishes that can’t be successfully cooked in advance, which makes it difficult to consider serving when I have guests for dinner.

It’s so easy to make a good risotto, but make sure that you choose short-grained plump rice, such as Arborio, Carnaroli or Vialone Nano.

The only way to make risotto is to stand over it until cooked. DO NOTHING else! Not really evident in my case where Axel is shoving her head between my knees to carry her and Kaia is constantly asking me to come and play with her and Polly Pockets. The hot stock is added little by little until rice is soft and creamy. This will take you around 20 – 25 minutes, for this amount of time at a hot stove, it’s really worth to use the appropriate rice.

Risotto can be combined with any vegetables you like or also seafood. The best risotto I ever had was cooked with champagne instead of wine, and used asparagus instead of zucchinis. I didn’t have any asparagus today and didn’t want to open my pricey bottle of champagne:), but I do recommend that you try it.

Zucchini and Mushroom Risotto

Ingredients

  • 2 tbsp Olive Oil
  • 1 large yellow zucchini
  • 250g fresh mushrooms sliced
  • Pinch of Sea Salt

To make the rice

  • 250g Arborio rice
  • 25g Unsalted butter
  • 1 Onion, minced
  • 1 cup white wine
  • 750ml Vegetable stock, hot (preferably home made)
  • 25g Parmesan, shaved
  • Salt and Pepper to taste

Cooking Directions

 1. In a medium saucepan, place the mushrooms and the zucchinis with olive oil and sweat until cooked. Season with salt.

2. In a separate heavy bottomed pan, heat the butter and add the onion, stirring occasionally, until soft and transparent. Add in the rice and cook, for 2 minutes.

3. Mix in the wine to the softened onions and cook until the liquid has evaporated off.

4. Pour in 1 cup of the stock to the onions and rice and cook, stirring occasionally with a fork, until liquid is almost absorbed. Repeat this process until rice is thick and creamy; the rice should still have some chew to it. Season to taste.

5. If the rice is still hard do not add water. It has to be cooked with additional stock.

6.Once the rice is cooked, mix in the vegetables and add Parmesan cheese and serve immediately.

7. To finish drizzle with olive oil (optional)

The Italian Saga: Lemon Panna Cotta With Strawberries

As sophisticated as it looks, Panna cotta is unbelievably easy to make.

Fabulous for dinner parties and can be made a day or two in advance and kept in the refrigerator. I also love it because it’s a real versatile recipe that can be combined easily to whatever seasonal fruits available.

Perfectly served with caramel sauce, honey, tropical fruits, cappuccino, coconut, etc… but my favorite combo is Lemon Panna Cotta with Strawberries! The lemon’s affair with the strawberry is scandalous. This recipe is irresistible and I haven’t found one person who doesn’t absolutely love it! I served it yesterday to my guests, and they practically licked the flute clean:) I love this feeling. Satisfying!

This recipe is pretty much my own after I’ve tried so many others from books and websites, it’s easy and delicious.

That’s the beauty of Tuscan cooking: simple and effortless. Enjoy!

Ingredients

Lemon Panna Cotta

  • 1 ½ tsp unflavored gelatin
  • 2 tbsp cold water
  • 1 cup heavy cream
  • 1 cup whole milk
  • 1/2 cup sugar
  • 
1 tsp vanilla extract
  • 2 tbsps limoncello
  • 
1 tbsp lemon peel, grated
  • 1 cup sour cream

 Strawberry Coulis

  • 200g fresh strawberries, hulled, chopped small
  • 10g butter (optional)
  • 3 tbsp brown sugar
  • 
1 tbsp lemon juice
  • 50g fresh strawberries, hulls removed and cut in half to decorate.

Preparation

  1. To make the strawberry coulis: In a medium saucepan, combine the strawberries, butter, sugar, and lemon juice. Cook over medium-high heat until the sauce becomes like a purée. Remove from the heat. If you like your coulis thin, strain it or blend it swiftly with a stick hand blender.
  2. To make the Panna Cotta: Sprinkle the powdered gelatin over the cold water and let soak for 5-10 minutes until soft.
  3. Pour the cream and the milk in the saucepan and heat until warm. Stir in the sugar and vanilla until dissolved.
  4. Remove from heat and stir in the soaked gelatine, limoncello, lemon peel and sour cream until smooth.
  5.  Pour into serving glasses (only half of 3/4 way) and refrigerate until firm. The time depends on the size of the glass, but be sure not to take it out too early.
  6. When the Panna Cotta has firmed, pour a layer of strawberry sauce over each treat and decorate with fresh strawberries. Let set up in refrigerator.


Pasta with homemade pesto and cherry tomatoes

I’m back to Beirut, but my heart is still in Toscana! I close my eyes and I see the flowing hills of vineyards. We were in the countryside and Gosh what a charming place. Captivating! I know that I’ll be back to visit again.

Meanwhile, this week I’m indulging myself with a lot of Italian food inspired from my trip.

Winter will come soon and freeze my basil plants, so I decided to pick the leaves off to make homemade pesto sauce.

Making your own pesto might sound extravagant, but in fact it’s super easy and will sure make you win your friends impression. If you like, it can be prepared ahead of time and stored in the fridge, just make sure that it has a decent layer of olive oil on the surface to make it last for longer period of time. Pesto is not only tasty with spaghetti, but is brilliantly combined to Turkey Panini or grilled Chicken and many other dishes.

I enjoy more making the pesto myself when I know that the basil leaves have been freshly picked in my garden, the pine nuts are sourced from my mother-in-law –they have 20,000sqm of pine nuts trees around their house in Baskinta– the olive oil is from the south of Lebanon –39% of the regional distribution of olive groves in Lebanon comes from the South– and the Pecorino cheese is also homemade, a gift from Alessio, Serge’s Italian friend. He taught me to use half Parmesan and half Pecorino cheese in Pesto sauces. The outcome is fabulous! Grazie Signor:)


Ingredients

  • Spaghetti #7
  • 3 tbsp Olive Oil
  • 400g cherry tomatoes, sliced in half
  • Pinch of sugar
  • Basil to decorate
  • Sea Salt

For the Pesto

  • 50g Fresh Basil (or 2 big handfuls of fresh basil), chopped
  • 1 garlic clove, peeled and finely chopped
  • 1tbsp pine nuts
  • 6tbsp Extra Virgin Olive Oil
  • Sea Salt and Pepper
  • 25g Parmesan Cheese, freshly grated

Cooking Directions

  1. To make the pesto, in a food processor blend basil, garlic, pine nuts and Parmesan around 30 seconds or until you have a smooth paste (Though, if you like it coarse, using your food processor click the pulse button very quickly maybe once or twice). Add the olive oil to the mixture and season to taste with salt and pepper. If you don’t have a food processor you can use a mortar and a pestle.
  2. Put a large pan of salted water on to boil and cook the pasta as instructed on the pack. You may like to add a drizzle of olive oil and a sprinkle of oregano in the water.
  3. While the pasta is cooking, heat the oil in a frying pan and add the tomatoes. Season with salt, pepper and a pinch of sugar. Cook over a medium heat, shaking the pan occasionally until tomatoes are soft and beginning to char.
  4. Drain the pasta. Add pesto sauce to taste (you might not choose to put all the prepared sauce), drizzle little olive oil and mix. Add tomatoes.
  5. Serve the pasta decorated with fresh basil leaves and more fresh shaved Parmesan.