Orange Marinated Salmon

OrangeMarinatedSalmon-Blog

As the weather gets colder around here, more hearty meals and soups have been dispatched from my kitchen.

Last week was really cold, temperature dropped to 5°C, schools were off because of the storm. We had many “Raclette” nights and casual dinners with friends and neighbors. After all who wants to be out in that rainy weather!

We simply enjoyed the laid-back inside with the fireplace on to warm up the atmosphere.

One of my favorite quick-fix meals is Orange Marinated Salmon. It comes together really quickly! It’s entirely stress-free and enormous success. Don’t you love that?

Serve it with Basmati rice, baked potatoes or Fettucine. This dish is a glam!

4 Servings

Ingredients

  • 4 salmon fillet (around 200g each piece)
  • 1/4 cup runny honey
  • 1 cup orange juice
  • 2 tbsp light soy sauce
  • 2 tbsp olive oil
  • 1 tbsp red wine vinegar
  • 1 tsp dried rosemary
  • Sea salt and black pepper, to taste

Preparation

  1. In a shallow pan, place fish as one layer and sprinkle with salt and pepper rubbing both sides of each fillet. Combine the rest of the ingredients and drizzle over the salmon to coat well all pieces. Refrigerate for 1 hour.
  2. Drain marinade. Lightly grease a baking dish with cooking spray and bake uncovered at 180°C or 350°F for 15mn to 20mn or until fish flakes easily with a fork.
  3. Serve with Basmati rice.

Note: If desired, reduce 1 cup of the marinade over low-medium heat until it thickens and serve it as a sauce. 

Juicy Christmas Turkey

Christmas Turkey - MayaOryanPopular restaurants and catering companies get more than a 100 orders of turkey each on 24 and 25 December every year. They start baking turkeys weeks before and store them in freezers. On same day, it’s stuffed, plated and delivered. No wonder I never liked it!

The secret to a juicy and flavored turkey is to be cooked on same day. It’s not complicated at all. It just takes time in the oven. It’s an easy recipe and is always a hero dish for main events like Christmas.

I like to use a lot of fruits in my recipe to flavor the turkey; it blends nicely with sautéed peas, carrots and sweet potatoes. Delicious!

If you buy a frozen bird, allow at least 24 hours to thaw. And when you take it out from the oven, remember to let it stand for about 30 minutes before carving.

Happy holidays to all!

Ingredients

  • 1 (5 to 6kgs) turkey
  • 1 orange, cut into wedges
  • 1 lemon, cut into wedges
  • 1 apple, cut into wedges
  • 6 dried apricots, chopped
  • 1/4 cup dried sultanas or cranberries
  • 2 sticks of cinnamon
  • 3 bay leaves
  • 1 tbsp olive oil
  • 1 onion, sliced
  • 2 carrots chopped
  • 1/2 cup of parsley
  • 3 fresh rosemary sprigs
  • 1 tbsp dried oregano
  • 1 cup of white wine
  • 1/2 stick (50g) unsalted butter, melted
  • 1 tsp Dijon mustard
  • Salt and pepper
  • 1 oven bag size Large
  • 1 tbsp all-purpose flour

Directions

  1. In a small saucepan over medium heat stir 1 tablespoon of olive oil, the cinnamon, the bay leaves, the onion, the carrots and the parsley, until the onion is cooked and the carrots are tender. Discard cinnamon and bay leaves and set aside.
  2. Preheat oven to 200 degrees C.
  3. To make the turkey: Start with discarding neck and giblets. Rinse the turkey with the wine (or apple juice) over the sink. Don’t rinse with water.
  4. Mix the oregano, salt and pepper to the butter. Rub the butter mixture all over the turkey and between the turkey breast meat and skin.
  5. Put one tablespoon of flour in the oven bag and divide the remaining ingredients (orange, lemon and apple wedges, apricots, sultanas, rosemary and onion mixture) to place some in the main turkey cavity and some in the oven bag.
  6. Tie the legs together to hold the shape of the turkey. Put the turkey inside the bag and seal in. Place the turkey inside a roasting pan and position the pan on the lowest rack in the oven. Put 3 cups of water in the pan.
  7. Roast the turkey for 40 minutes. Reduce the oven temperature to 175 degrees C. And then cook again for about 21/2 hours or according to the weight of the turkey and the manufacturer’s instructions. Remove from oven. Take off the turkey of the bag and return it to the pan. KEEP THE LIQUID TO MAKE THE GRAVY.
  8. Pour 1 more cup of water into the pan. Continue roasting the turkey about 1 hour longer or until a meat thermometer inserted into the thickest part of the thigh registers 75 degrees C to 80 degrees C or until the juices run clear when the thickest part of the thigh is pierced with a skewer.
  9.  Transfer the turkey to a platter and tent with foil. Let stand 30 minutes while preparing the gravy.
  10. To make the gravy: Strain the turkey pan juices from the roasting pan through a sieve and into a 4-cup glass measuring cup; discard the solids. Spoon off the fat from atop the pan juices. Add enough chicken broth, about 1 to 2 cups, to the pan juices to measure 4 cups total. Melt the remaining butter in a heavy large saucepan over medium-high heat. Add the flour and whisk for 1 minute. Gradually whisk in the broth. Simmer until the gravy thickens slightly, whisking often, about 10 minutes. Season with mustard, salt and pepper. Serve the turkey with the gravy.

Mushroom, Ham and Cheese Pizza

During the last few years, Milan has been an addictive destination to me! No matter where I wanted to go in Europe, it has to be via Milano. Partly is for the shopping of course but mostly is for the bounties of Italy. I’m in love with this country, the nature, the culture, the traditions, the walks and obviously the food!

Last week I was there with my dear friend Nidal. We had a blast! We enjoyed every bit of our stay.

On our last day, we drove north to the town of Como. We walked around the small streets then went to see one of the top travel destination in Italy, lying between Milan and the border of Switzerland, the Lake Como. Wow! Beautiful! I think my heart has stopped beating for few seconds.

After Como we crossed the Swiss frontiers visiting Lugano, where we had lunch, bought Gruyere cheese and Swiss chocolate and walked the stretch along the Lake Lugano. I was surrounded with breathtaking scenery! I stared at the deep blue water, the mountains and the white peaks in disbelief, thinking this is all I wanna do, everything else can wait!

Zap to reality, to Lebanon, with its never-ending political issues and stressful events bursting every now and then.

Inspired by my trip and all fused with my passion for Italian cooking, I decided today to bake a Pizza.

This recipe uses fresh onions, garlic, mushroom and scented thyme. I sprinkled fresh garden basil over the Mozzarella and the Gruyere cheese, to give it a little extra flavor and fragrant.

Unfortunately, it’s not the best shot I have on my website, next time I make the same recipe, I’ll try to take a better picture.

I would be lying if I say that I make Pizza often. It’s so easy to prepare, but for some reason I always manage to forget about this recipe. And when I do it, I’m always proud of my achievement, which earns me big smiles from my hubby and girls!

Mushroom, Ham and Cheese Pizza

Ingredients

 The dough

  • 400g all-purpose flour (strong flour Tipo “00” is recommended)
  • 100g semolina or ferkha
  • 1tsp salt
  • 7g/2 ¼ tsp/1 sachet active dry yeast + 50ml hand-hot water
  • 1tsp sugar
  • 1 cup lukewarm water
  • 2 tbsp extra-virgin oil

Filling

  • 1 small onion, finely sliced
  • 2 garlic cloves, crushed
  • 2 cups of tomato sauce or passata
  • 1 tbsp ketchup
  • 200g sliced ham
  • 100f fresh mushrooms, sliced
  • Handful of fresh thyme
  • ½ cup black olives, pitted
  • 1 tbsp pizza seasoning
  • Salt & Pepper
  • 1 cup mozzarella cheese, grated
  • 1 cup gruyere cheese, grated

Directions

  1. In a jug, dissolve the yeast and sugar in water and let stand for 10 minutes or until frothy.
  2. In a large bowl, sift flour and semolina together. Add salt.
  3. Make a well in the middle. Add oil to the yeast mixture and pour it in the centre of the well. Start mixing, bringing the flour from the edges to the middle. Add water and keep kneading to form a springy large ball with the dough.
  4. Cover the dough with an oiled sheet of cling film and return to the bowl. Cover it with a kitchen towel and leave the dough to rise about ½ an hour or until it has doubled in size.
  5. To make the topping: In a saucepan heat oil and sauté onions and garlic for 3 minutes. Add tomato sauce, ketchup and mushrooms and cook for a further 2-3 minutes. Season with oregano or pizza seasoning and salt and pepper.
  6. Off the heat add the thyme and the olives and mix.
  7. Remove the dough from the bowl and roll out on a floured surface to form a rectangular shape. Place it in the mold pushing out the edges evenly. For thick dough, it should be no more than 1cm.
  8. Brush the dough with the tomato Passata sauce and spread the topping evenly over the pizza base and sprinkle with Gruyere and Mozzarella cheese. Bake in a preheated oven 200°C for 20-25 minutes or until the dough rises and turns slightly golden.

Chinese Noodles with Sesame Seeds and Tahini

Here comes this time of the year when summer is over and big amounts of money has been spent on vacations and tuition fees and little money is left for my grocery budget. TIME TO CLEAN UP MY PANTRY!

What’s in here? Huge quantities of sauces that I never use, a stock of noodles that I forgot about and some canned vegetables expiring soon.

Concentrating on the noodles, I kind of created the following dish, it’s not one of those secret recipes that have been running in the family from one generation to other, nor a recipe I learned from some celebrity chef I worked with, it’s just a kind of inspired-by-the-moment recipes that turned out to be delicious and got the cheer of the audience*.

A true simple recipe that came together quickly like a magic meal. Hope you try it and enjoy it as much as we did.

*Audience as in Serge, Kaia and Axel

Ingredients

  • 1 pack of soba noodles
  • 2 tbsp vegetable oil
  • 1 garlic clove, crushed
  • 1 tbsp fresh root ginger, grated
  • 2 sprigs green onions, sliced
  • 1 red bell pepper, sliced
  • 1 can whole sweet corn, drained
  • 1 cup baby carrots
  • 1 cup baby asparagus, each sprig cut in 3
  • Juice of 1 lemon
  • ¼ cup soy sauce
  • ¼ cup castor sugar
  • ¼ cup tahini paste
  • 1 tbsp rice vinegar
  • Salt and Pepper, to taste
  • ¼ cup toasted sesame seeds
  • ¼ fresh coriander, chopped
  • ½ cup toasted peanuts
  • ¼ cup cabbage, shredded

Preparation

  1. Cook the noodles according to directions on package. Drain and set aside.
  2. In a wok or a large frying pan, stir-fry the ginger and garlic on a medium heat, for 2-3 minutes then add the green onions.
  3. Increase the heat to high and stir-fry the bell pepper, for 3 minutes.
  4. Add the carrots, the baby corn, and cook for a further 3 minutes.
  5. Finish with the asparagus and stir-fry for a further 2 minutes.
  6. Drizzle with lemon juice and transfer to a large saucepan.
  7. In a measurement jug or a bowl, mix together the soy sauce, sugar, tahini paste and rice vinegar. Season with salt and pepper. Pour over the vegetables and add the noodles.
  8.  Toss all together to mix and add the coriander then sprinkle with toasted sesame seeds and peanuts and garnish with cabbage. Serve immediately.

Kishik porridge or Kishk

I came back from the gym to find out my handsome man making breakfast! Isn’t it great to have someone cooking for you! I’m so blessed I know! Not only the pictures he takes for my blog are amazing but he also loves cooking!!

My beautiful girl and petite adorée Kaia is back to school, and this means longer mornings for me to finish all those piled up tasks and to take pictures of food right before I eat it:)

Thursday, September 20, 2012. The Oryans breakfast menu is Kishik soup.

Lebanese Kishik powder is made from wheat (burghul) fermented with yogurt (laban). It’s a 10-days-process, that till now many of the Lebanese, especially living in the village including my mom-in-law Laure, prepare it every year in September as part of their pantry (mouneh) ingredients for winter. It’s cooked in many ways, my favorite is Kishik samosa style or Kishik porridge.

My share of kishik was delivered yesterday and Serge couldn’t wait to cook some. It’s one of his favorite food! It’s another staple in our house. He only makes it for breakfast, but many will eat it for lunch or dinner. I love it without the meat since it has always been a breakfast meal for me. A true delight!

Thankfully, my hubby is finally sharing his recipe!

Much love, Maya xx

Kishik porridge

Ingredients

▪    2 tbsp olive oil
▪    1 tbsp butter
▪    1 medium onion, chopped
▪    2 cloves garlic, crushed
▪    ½ kg lamb, ground (optional)
▪    2 tbsp pine nuts, toasted
▪    1 potato, peeled and diced small
▪    1 cup kishik (found at stores who sell Mediterranean food)
▪    4 cups water
▪    Salt to taste
▪    ½ tsp white pepper

 Preparation

  1. In a pan, heat olive oil then melt the butter. Add the onions and sauté until soft and golden. Add chopped garlic and cook for another 3-5mn.
  2. If you’re cooking kishik with meat this is when you have to add it. Add meat to the pan and cook for 10mn. Add pine nuts. Stir. Add potatoes and sauté until tender.
  3. Lower the heat, add Kishik and water and stir well. Season with salt and white pepper.
  4. Stir thoroughly. Cook until the soup is thickened.

Artichoke ragoût with Rice

I opened my freezer to put some ice cream inside and realized that I can’t because it’s packed with Al Wadi Al Akhdar frozen vegetables. I recently was offered the whole range of their products and worked on more than 60 recipes for the re-launch of their website. I’m lucky I know to work on such a quality and tasty brand, but here’s what I encountered: food jam in my freezer!

I wasn’t planning to cook dinner! I was up at 7am, went to the gym, got back with full energy and worked like a happy busy bee, thinking of finishing my day with a nice warm bath and watching TV series in bed. So I stared at my freezer wondering either I eat the entire ice cream and work out an additional hour the next morning (Nope!) or forget about watching TV and cook something easy using some of those veggies.

It didn’t really take me time to decide, I’ve immediately chosen 2 bags of artichokes bottoms, one bag of baby carrots and some frozen coriander. In my recipe here below, I recommend using fresh vegetables, but if you were like me looking for a simple recipe that can be ready in no time, frozen vegetables are always my choice after fresh, especially on busy evenings.

My mom cooks this yakhne – like we Lebanese call a stew– with meat cubes and no coriander in it. It is also delicious, but since I prefer vegetarian meals, this is my version with an extra squeeze of lemon juice just before removing from heat.

“The food was ready in 45 minutes and Serge enjoyed a homemade dinner when he arrived! It just really can’t get any better than this!”.

Ingredients:

  • 500g frozen artichokes bottoms
  • 2 carrots, peeled and chopped
  • 3 medium potatoes, peeled and diced
  • 1 cup of water
  • 2 tbsp flour
  • 2 tbsp vegetable oil
  • 1 large onion, chopped
  • 2 garlic gloves, minced
  • ½ cup fresh coriander, chopped
  • Salt and Pepper, to taste
  • 1 tsp white pepper
  • Juice of one little lemon

Preparation

  1. In a bowl combine artichokes, potatoes and carrots. Dilute the flour in the water and pour in.
  2. In a large pot, heat the oil and cook the onions, until golden.
  3. Add the garlic and the coriander, stirring frequently.
  4. Stir in the vegetables coated with flour. Season with salt and peppers. Cover with water and simmer on low heat until cooked well.
  5. Drizzle with lemon juice and serve with short grain rice and Lebanese flat bread.

Quails With Prunes And Thyme

My friend Ellà is a foodie too, whenever I invite her over, I feel my cooking skills are being tested. I have to admit her food is DELISH! I found out the best way to avoid her comparisons with other recipes was to cook her meals she never had before or at least not common meals, like quails (in Arabic is Ferreh).

I think we all have Ellàs in our lives and wondering how to impress them. This recipe is simple and does the job, but don’t forget to top it with liquor. Only liquors with high alcohol content can be used to flame food. I use cognac, rum or brandy. Wine or beers will not work. Flambé food adds an extravagant touch to the evening, especially if it’s done at the table where it’s served. I usually transfer quails to a serving dish and ignite the brandy. It’s dramatic! And my guests ARE impressed! What kind of show off is this? Trust me the feeling is fabulous! How do I know, you ask? ‘Coz Ellà called the next day I invited her and asked for the recipe:)

Quails flambéed with Prunes and Brandy

Ingredients

  • 6 Quails
  • 3 tbsp butter, melted
  • 3 tbsp sumac
  • 1 tsp salt
  • 1 tbsp sugar
  • 1 tbsp cinnamon
  • 6 prunes, pitted
  • 2 onions sliced
  • 4 carrots, sliced
  • 1 bunch fresh thyme
  • 3 stalks celery, chopped
  • 500ml Vegetable Stock
  • 1/4 cup brandy

Preparation

  1. Position a rack in the lower third of an oven and preheat to 220°C/400°F.
  2. Rinse inside and outside of quails, and pat dry with paper towels.
  3. Add sumac and salt to the melted butter and use this mixture to brush all 6 birds.
  4. Mix sugar and cinnamon and season each of the bird cavities.
  5. Fill each of the cavities with one prune, 1 tablespoon of onion, and little of the bunch thyme. Tie the quail’s legs together with kitchen twine, and set aside.
  6. In the bottom of a large roasting pan, scatter the vegetables; carrots, celery, the remaining onions and thyme. Arrange the quails on the top of the vegetables. Drizzle with stock and bake for 55 minutes or until quails are cooked through.
  7. To make the flambé, pour the brandy over the quails and ignite with a match or a lighter. When flame goes out and liquor has burned off, you are ready to serve.
  8. It’s great with rice, green salad and pitta bread.

Chicken Breasts with Parmesan and Mashed Vegetables

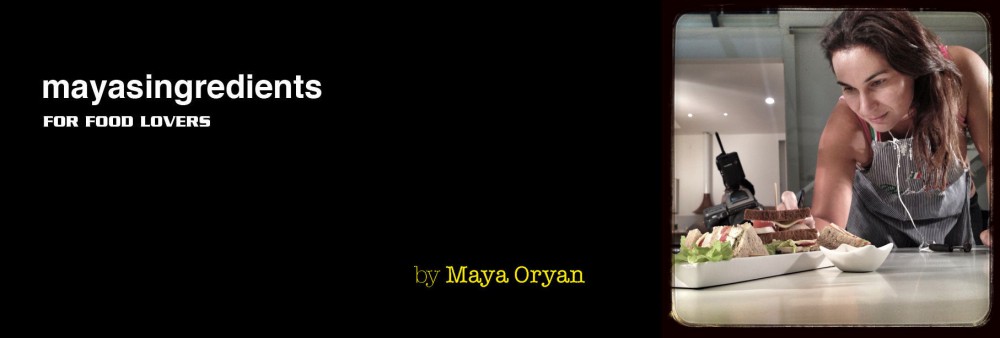
My day starts at the gym, and while my body is burning calories, funny enough, my mind is thinking: “What should I cook today?”

The competition is tough. I’m going to be in Dubai for a 4-weeks-shoot and my mom is coming to look after my daughters and cook few of her delicious food. God Bless my mom, she’s the best!

I really want Kaia and Axel to remember me cooking something they love before I travel and leave a tasty impression. My choice is Chicken Breasts with mashed potatoes, mashed carrots and mushy peas. It’s a fancy dish, healthy and colorful.

I love those recipes filed under Food Family, they make everybody in my house happy!

There’s something about the mashed vegetables that I love! (Trust me I still have all my teeth;-) It has to be the colors, not only the taste.

I melt in front of a plate with mashed potatoes, carrots and something green like peas or broccoli, it feels a lot like baby food but a pump of each color adds a lot to the presentation of the plate. Here you go, this is the food stylist in me speaking;-)

This dish is a crowd-pleaser and can be prepared for your family or for your guests. I hope you enjoy all four recipes!

Unfortunately I’ll have to drop off the radar on you for the following weeks, as I’ll be living in hotels and away from my beloved kitchen.

Chicken Breasts with Mashed Vegetables

Ingredients

  • 4 pieces / 500gms chicken breasts
  • ¼ cup sunflower oil, for frying
  • Pistachio and pumpkin seeds, to decorate

Marinade

  • 1 cup / 250ml milk
  • 1 fresh lemon, cut in 4 wedges
  • 1 fresh apple, cut in 4 wedges
  • 1 tsp salt

Coating

  • ½ cup / 120 g plain flour
  • 2 eggs, beaten
  • ½ cup / 120 g dry breadcrumbs
  • 3 tbsp Parmesan, freshly grated
  • Salt and white pepper, to season

Preparation

1.In a bowl or plastic container mix the marinade ingredients and soak the chicken for 2 to 3 hours.

2.Prepare 3 plates. Put the flour in the first plate, the eggs in the second and the mix of the breadcrumbs, Parmesan, salt and pepper in the third plate.

3.Take out the chicken from the marinade and toss them in the flour first. Dip in the egg second and roll in the breadcrumbs mixture to coat.

4.In a large frying pan heat the oil and cook the chicken breasts for 3–4 minutes each side or until golden and cooked through, turning occasionally.

5.Alternatively, it can be baked in the oven. Pre-heat oven to 200ºC. Place the chicken pieces on a greased baking sheet and bake for15 to 20mn.

Mashed Potatoes

 Ingredients

  • 5 medium size potatoes, peeled and cut into big chunks
  • 1/4 cup milk
  • 1 tbsp butter
  • 1/2 teaspoon salt
  • White pepper, to taste

Directions

1.Bring a pot of lightly salted water to a boil over. Add potatoes, and cook until tender.

2.Drain potatoes, and purée with a hand potato masher. Add butter, milk, salt and pepper, and mash until blended. Adjust seasonings to taste and serve.

Mashed Carrots

 Ingredients

  • 500g carrots, peeled and chopped
  • 1 sprig of spring onion, washed and sliced (the white part only)
  • 1/4 cup vegetable stock
  • 1 tbsp butter
  • 1 tsp brown sugar
  • Salt and pepper, to taste

Directions

1.Bring a pot of lightly salted water to a boil over. Add carrots and onions, and cook until soft.

2.Drain carrots and onions. Blend using a food processor. Add butter, sugar, stock, salt and pepper. Blend until smooth. Adjust seasonings to taste and serve.

Mushy Peas

Ingredients

  • 500g frozen or fresh peas
  • 2 tbsp olive oil
  • 1 tsp sugar
  • 1/2 teaspoon dried mint
  • Black pepper and salt, to taste

Directions

1.Bring a pot of lightly salted water to a boil over. Add peas, and cook until tender.

2.Drain peas, and purée with a hand potato masher. Add olive oil, sugar, mint, salt and pepper, and mash until blended. Adjust seasonings to taste and serve.

Vodka Marinated Salmon

Serge and I love to have friends over dinner! During summer we enjoy the breeze outside on the terrace and during winter we enjoy cocooning inside with the fireplace really cozying up the atmosphere.

Lately we have had many friends visiting, but I had many photo shoots working long hours every day. Can you imagine getting home at 7:30pm, only 1 and a half hour before your guests arrive?

Because this happens to me very often, I now have in my repertoire numerous menus to be prepared in no time.

Salmon fillets are one of my favourite on the list offering a wide array of methods to cook; fried, baked, smoked, raw sashimi, … you can work wonders with it! It’s a gourmet meal!

Here’s one of the easiest and fastest recipe to prepare delicious baked salmon fillet. It results in a beautiful dish full of flavor and substantial savor.

I paired it with basmati and wild rice, and steamed edamame beans. Garnished it with carrots to add colours.

My guests loved the food and asked for the recipe, this request never fails to make me feel all warm and fuzzy inside:)

Vodka Marinated Salmon

Ingredients

  • 4 salmon steaks (about 1inch / 2cm thick)
  • ¾ cup / 185ml vodka
  • ¼ cup / 60ml fresh orange juice
  • 1 tbsp thyme, washed and picked
  • 2 sprigs, Rosemary
  • 1 tbsp sea salt crystals
  • Black Pepper to taste

Preparation

1. In an oven dish, place salmon steaks, skin-side down, as one layer and drizzle with vodka and orange juice. Push the thyme into the score marks of the fish. Sprinkle the rosemary and season with salt and pepper. Refrigerate for at least 20 minutes.

2. You can preheat oven to 180C/350F/gas 4 and bake for 10 – 15 minutes. Or you can transfer to a frying pan along with the marinade and cook for 5 minutes on the skin side and 1 minute on the other side or until crisp.

3. Serve with basmati rice and edamame beans and perhaps some wild rice.

The menu included all following items and I promise to share the rest of the recipes soon.

 Starters

Avocado Salad

Grilled Chestnut

Main Course

Salmon Fillet, mixed rice, edamame

Side Order

Baked Potatoes

Dessert

Apple walnut cake


Baked Whole Chicken with Potatoes and Rosemary

Thank you all for your wonderful emails and messages,  I made sure to reply to each and every one of you. I absolutely love that you cook my recipes!

My year ended on a wonderful note where I participated to a couple of TV shows (I’ll notify you when it’s due to airing) and loved the experience. December was a very busy month for me, I had a shoot almost every day, such a shame I had no time for blogging, but please don’t give me that look, blame my Food Styling career instead:)

I love the start of the new year and ready with a list of resolutions to tackle 2012.

Happy New Year to all!

Baked Whole Chicken with Potatoes and Rosemary

I realize that many people don’t like to make a whole chicken thinking it’s difficult and time consuming while it’s even simpler than any other dish and the preparation should take seriously less than 10 minutes.

Ingredients

  • 1 Chicken, whole /1.5 to 1.9kgs, neck and giblets removed
  • 4 Tbs Olive oil
  • 1Tbs Dried Oregano
  • 1tsp Cinnamon
  •  Kosher Salt and freshly ground Pepper, to taste
  • 1 small onion, chopped
  • 2 Rosemary sprigs, washed
  • ½ kg Baby Potatoes

Preparation

1. Position a rack in the lower third of an oven and preheat to 400°F/220°C.

2. Wash the chicken inside and out and pat dry with paper towels. Mix together the oil, oregano, cinnamon, salt and pepper and use this mixture to brush the skin of the bird. Place the onion inside the cavity

3. Place the bird in the oven dish and arrange around it the rosemary and whole baby potatoes (or quartered potatoes). Bake for 45 minutes or until chicken is cooked through.

4. When cooked cover with aluminum foil and let stand for 10-15 minutes before carving. If desired, decorate with canned or fresh clementine wedges and serve.